
On the blog

Check out Chantal’s beautiful version of the Bluebird shawl (design by EclatDuSoleil) crocheted in Whirl yarn (col Forbidden Fuchsia)
On YouTube
I had a mishap with my webcam, which decided to stop recording after about 20 minutes, without letting me know. I discovered this too late to be able to do anything about it, so I decided to publish the video anyway since I had already said most of what I wanted to say before the cutoff.
Please bear with me while I get better at this video thing… I will try to do better next time!
Mosaic crochet or sc stripes – how to close your rounds
Having written all these newsletters on mosaic crochet, I couldn’t resist – I had to start a project using this technique!
It’s a project worked in the round, so the question is, how to close the rounds as neatly as possible?
I meditated on what I already knew, I browsed the Internet for ideas, I thought about what I had learned, and I came up with a method that I find quite satisfying
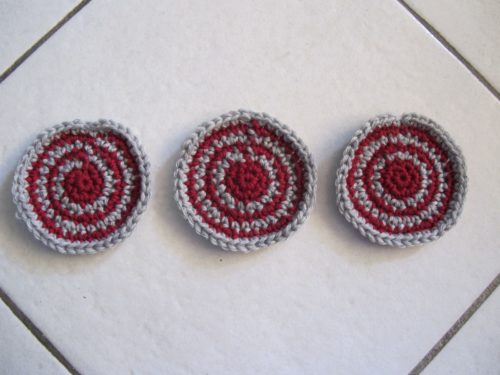
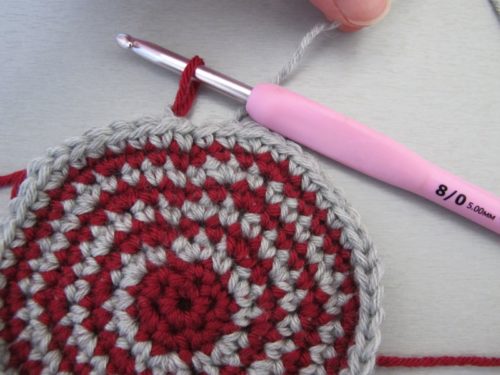
Here are three striped circles worked in the same
To the left, a circle worked as a spiral. It’s an easy and useful method when working in one
In the middle, the “classic” way to close rounds:
To the right, the method I’m going to present in this newsletter. It’s a clear improvement, don’t you think? The joins are almost invisible, and the stripes remain clear all around!
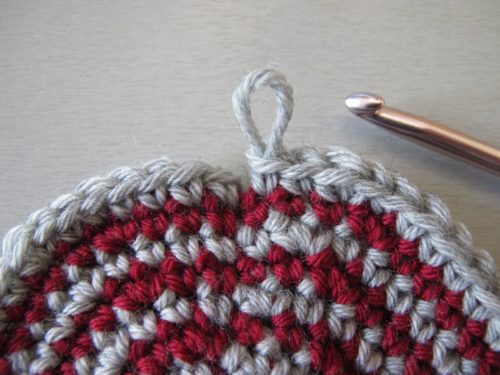
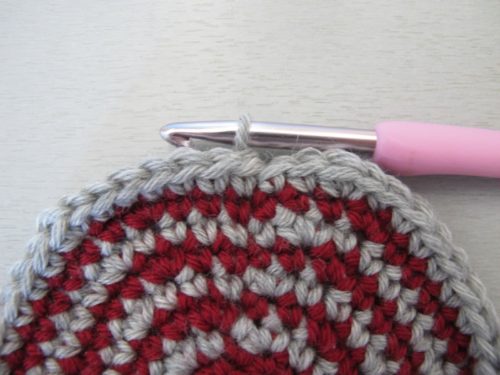
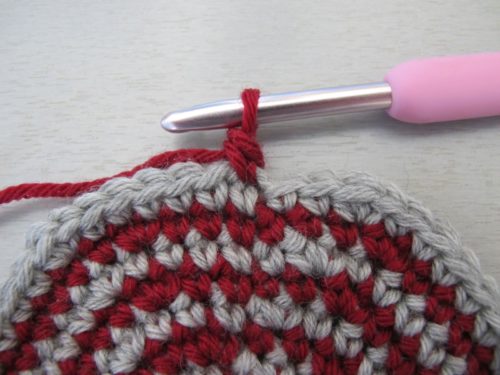
I have just finished my round in grey, simply by working
I insert my hook under both loops of the first stitch in the round, from back to front.
I put the “live”
Here we are, back on the right side. The first and the last stitch in the round sit together without using a slip stitch – the round is closed.
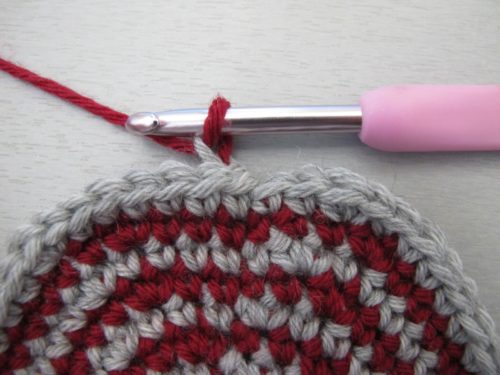
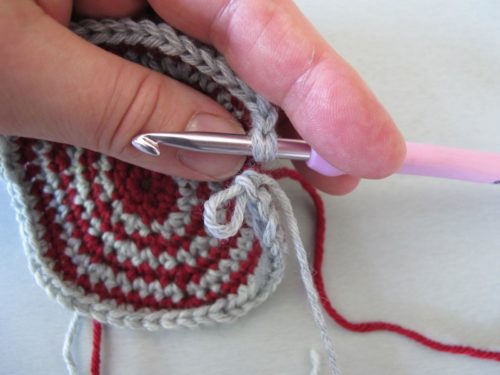
The next round will be red – ch 1 with the red yarn (waiting patiently at the back of the piece).
The next step is to pull the grey yarn tight so that the grey loop is minimized and disappears behind the work.
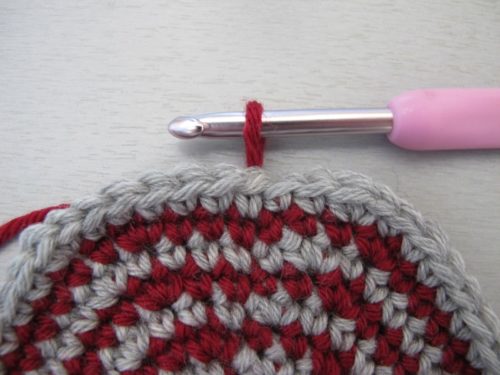
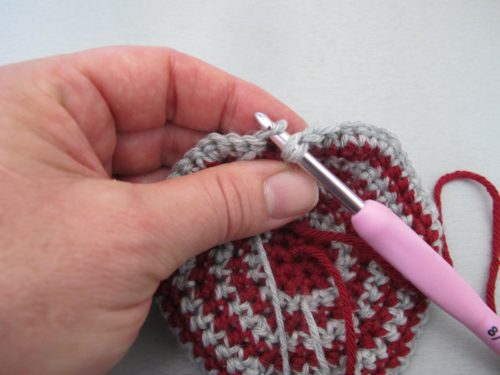
All we can see now is the red loop on the hook. I pull it up so that it’s long enough to run along the side of the first sc and over its top, without making an extra “ch 1”.
The first sc in the new round is made – I can continue my work as usual.
What do you think? Let me know in the comments below!
See you soon!
